Types of Tub Faucets
There are many different types of bathtub faucets to suit a variety of bathroom designs. Different bathtubs require different faucets, so when choosing a style, it is important to consider how the faucet will match the bathtub.
Freestanding Tub Faucets
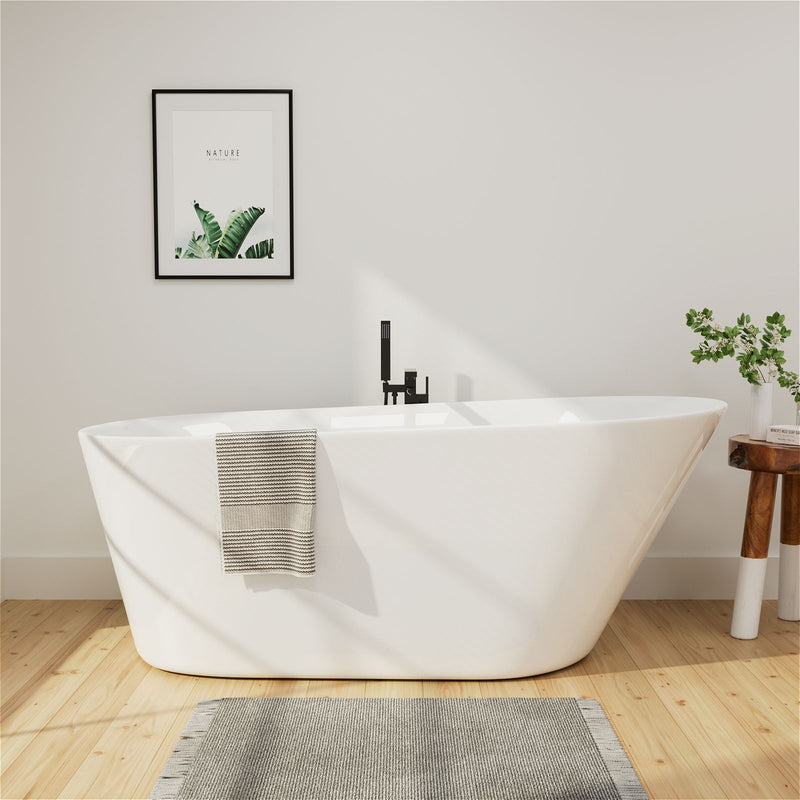
Freestanding tub faucets, also known as floor-mounted faucets, are free-standing and are designed for bathtubs without pre-drilled holes. They are anchored to the floor, towering above the edge of the bathtub, and can be placed anywhere in the space. Freestanding tub faucets do not need to be anchored to the bathtub and can be installed in multiple locations around the bathtub, allowing for great flexibility.

Before deciding to install a freestanding bathtub faucet, make sure your home has underfloor access as the water supply line is located underneath the finished floor and requires adequate space to access. The water supply line connects to a water source that is located underneath the finished floor and is usually equipped with a set of shut-off valves located a few inches above the floor. For this reason, most freestanding bathtub faucets need to be installed below the floor. If your bathroom is located on a concrete slab, consult a professional to determine whether a floor-mounted faucet is right for you. Freestanding bathtub faucets do not need to be anchored to the bathtub, which means there is no need to drill holes in the tub. This also provides convenience when deciding where to install your faucet.
Freestanding faucets come in a variety of finishes, such as chrome, brushed nickel, polished brass, oil-rubbed bronze, polished nickel, and even brushed or polished stainless steel. These faucets are ideal for freestanding or pedestal tubs, but can also be installed on claw-foot tubs.
Deck Mount Tub Faucets
Deck mount tub faucets are also called rim-mounted faucets. These faucets are used with tubs that have pre-drilled holes and are installed on the rim (or flat surface) of the tub. Two faucet holes are required for installation, and the distance between the two holes varies from tub to tub. So be sure to measure the distance between the two holes from center to center to ensure the faucet fits accurately. This measurement is called the "center measurement." For example, if your tub faucet holes are 7 inches on center, you will not be able to install a faucet with 8 inches on center without modification. Although less common, you can also install a deck-mounted tub filler on the perimeter deck outside the tub. If you plan to install the faucet outside the tub, make sure the faucet you purchase has a spout that extends far enough into the tub for proper filling.

Deck mount tub faucets require water pipes to connect them to the water supply. Supply pipes are necessary to carry water from the supply pipe to the faucet itself, and are most commonly rigid or inflexible supply pipes that run from under the rim of the tub to the faucet and connect to the water supply under the floor. For this type of application, there needs to be underfloor access, just like with freestanding faucets. If there is no underfloor access, a flexible supply pipe can be used to connect the faucet to the water supply through the bathroom wall. These deck mounted faucets are suitable for recessed, clawfoot, and freestanding tubs.
Wall Mount Tub Faucets
One of the most common bathtub faucets is the wall mount tub faucet, which is mounted on the bathroom wall next to the tub, keeping the deck uncluttered and clean looking. There is no need to install a faucet hole for the tub, as this type of faucet does not have any connection to the tub. When underfloor access is not possible, or you have or want a tub without pre-drilled faucet holes, a wall mount faucet is the perfect solution! It connects directly to the water supply behind the wall, hiding all existing water supply lines in your home. This will help you save money if you don't want to pay extra for water supply lines that other bathtub faucets may require.

Wall mount bathtub faucets are suitable for all types of bathtubs, but are especially suitable for niche bathtubs to make the edge of the bathtub look clean and neat. Before installation, make sure the spout is long enough to extend from the wall to the bathtub basin.
Tub Wall mount Faucets
A bathtub wall mount faucet is designed to be installed on the inner wall of the bathtub. It has faucet holes pre-drilled in different locations, and the mounting holes may be different for each bathtub. When choosing a bathtub faucet, it is best to consider the distance between the faucet holes to avoid problems during installation.

These faucets require holes to be drilled in the bathtub wall, and the holes are usually much closer together than the holes of countertop-mounted faucets. The standard center spacing for bathtub wall-mounted faucets is 3-3/8 inches. However, it is still important to measure the distance between the faucet holes on the bathtub before purchasing a faucet. Especially on older bathtubs, the faucet hole spacing can vary from 3-1/2 inches to 8-3/4 inches. These faucets often come with a small downspout for filling the tub, or a tall gooseneck for a more elegant look.
Tub wall mount faucets are suitable for a variety of tubs, including clawfoot, recessed, alcove, and freestanding.
Roman Tub Faucets
Roman tub faucets are often used with built-in or whirlpool tubs and need to be installed on the rim of the tub. These faucets require three or more faucet holes to install, one for each handle and one for the spout. Most Roman tub faucets also come with a hand shower, which requires an additional hole or two. Roman tub faucets cannot be installed on the rim of the tub due to the extra space required for installation. Roman faucets are similar to deck mount tub faucets, but offer a variety of handle options to match the style of your bathroom. If you want to use a Roman tub faucet with a freestanding or clawfoot tub, you will need to install a platform next to the tub.

Steps to Replace a Tub Faucet
In order to find a replacement faucet kit that will fit your existing plumbing, it is essential to inspect your existing tub faucet and handles. This will often also require measuring the length of pipe where the spout will be installed to ensure you find a faucet spout that is the right length.
If you are unsure about how to choose a new replacement part, consider removing the old part and taking it to your local hardware store to compare the existing part to the replacement part. Alternatively, you can simply ask the store staff to help you find the right part.
If you want everything to match, it is best to find a tub faucet kit that comes with the handle, stem, and replacement spout, rather than choosing products that are sold separately.
What You Need Before Replacing a Tub Faucet
Equipment/Tools
- Cloth or Towel
- Flat or Phillips Screwdriver
- Straight Socket Wrench
- Hex Wrench
- Pipe Wrench
- Tape Measure
- Caulking Gun
Materials
- Tub Faucet
- Tub Handle
- Caulk
- Plumber's Tape
- Plumber's Grease
Step 1 Shut off the Main Building Shutoff Valve
Almost any home plumbing repair requires shutting off the water to prevent leaks, flooding, and burst pipes during the repair. Locate the shutoff valve for the main building, which is usually located in the basement or machine room.
Turn off the water and open the faucet at the laundry or basement bathroom sink to drain most of the water from the system. It is also recommended to open the sink faucet and the tub faucet to drain the water from the pipes.
Step 2 Lay a Towel or Rag on the Bottom of the Tub
When replacing a tub faucet, you will need to remove and dispose of one or more screws. Placing a towel or dust rag on the bottom of the tub can prevent these small accessories from accidentally falling into the drain. It is also a good idea to find a safe place outside the tub to store these accessories so that they can be safely stored the next time they need to be reinstalled.
Step 3 Remove the Handle Index from the Valve Stem
When you begin replacing the faucet, use a flat-blade screwdriver to pry the dowel pin off the handle stem. The dowel pin is a small plastic or metal ring located in the center of the handle that is used to prevent contact with the fastener. If you carefully pry up on both sides of the dowel pin, you can remove it from each handle without chipping or cracking. However, if you use too much force, you may damage the dowel pin. However, this may not matter if your new faucet replacement kit came with a new handle and dowel pin.
If your tub faucet has multiple handles, repeat this step to remove the index key on the second handle. This will expose the fastener so that the entire handle can be removed.
Step 4 Loosen the Handle Fastener to Remove the Handle
Use a flathead or Phillips screwdriver to loosen the screw located below the index. If the screw appears to be stuck, do not continue to turn it with the screwdriver as this may damage the screw. It is recommended to use a lubricant to lubricate the screw.
Turn the screw counterclockwise until it is completely unscrewed, then set the screw in a safe place until it is needed to reinstall. The handle should now slide off the stem easily. If you have a second handle, repeat this process to unscrew the screw and handle.
Step 5 Unscrew the Faucet Stem
Once the handle is removed, you should see a thin tube sticking out of the wall. This tube is called the stem and is used to control the faucet. The valve stem can be removed using a socket wrench that fits over the valve stem and clamps the hex nut. With the socket wrench in place, turn the nut counterclockwise to loosen the valve stem. Once the valve stem is loose, simply grab it by hand and pull it out of the wall. Repeat this process for each handle in your bathtub faucet installation and set the old part aside for reference when purchasing compatible replacement parts.
Step 6 Remove the Spout
The spout of the bathtub faucet is either secured with a mounting screw that is usually located at the bottom of the spout, or it is screwed directly to the pipe. Check if there are mounting screws, and if so, use a hex wrench or screwdriver to remove the screws and set them aside in a safe place for reinstallation. Pull the spout and it should slide off the pipe smoothly.
If the spout does not have mounting screws, you will need to wrap the spout with a cloth or towel to protect the metal part, then clamp the spout with a pipe clamp and turn the entire spout counterclockwise to remove it from the pipe. Once the spout is loosened, it should slide down to reveal the plumbing inside.
Step 7 Measure the Plumbing and Purchase Replacement Parts
To make sure the fittings you purchase are compatible with your existing plumbing set, measure the length of your plumbing with a tape measure. You'll need a replacement spout that's longer than your plumbing. Use the old handles, stem, and spout as a reference when you go to your local hardware store to purchase replacement parts.
Keep in mind that if your shower has a multiple-handle setup, you'll have to do a lot of re-plumbing to switch to a single-handle setup, so it's better to invest in a set of similar handles than to opt for replacement handles that won't work with your existing plumbing.
Step 8 Screw in the New Stem
Once all of the new parts are in place, you can begin reinstalling your new tub faucet. First, insert the threaded end of the stem into the hole where the old stem was previously installed. Turn the stem clockwise, hand-tightening first, then using a socket wrench to ensure a secure connection. Be careful not to over-tighten the stem, which can damage the plumbing. If your tub has multiple handles, repeat this process for each handle to install the new stem.
Step 9 Install the New Handle
Reinstalling the handle is very simple. Simply slide it over the new stem until the handle touches the wall. Once in place, use a flat-blade or Phillips screwdriver to secure the old screws you removed (or the new screws that came with your tub faucet replacement kit) to the handle. With a gentle push, the index cap pops back into place to protect the screws and finalize the look of the handle.
If your tub has multiple handles, repeat this step for each handle. You can also use a caulking gun to caulk around the base of each handle to prevent water from seeping into the wall.
Step 10 Install the New Spout
Before installing the spout, seal the pipe threads with plumber tape to ensure a secure seal and prevent leaks. If the pipe is not threaded, it is recommended to apply plumber-specific grease to the pipe to lubricate and protect the joint.
Slip the new spout over the pipe and secure it to the pipe with the mounting screws. If your spout does not have mounting screws, simply turn the screws clockwise to screw the entire spout onto the pipe. Wrap the spout with a cloth or towel to prevent accidental scratches on the new fixture, then tighten the spout with a pipe wrench. Just make sure the spout is snug against the wall and facing downward.
Use a caulking gun and caulk to seal the bottom of the spout to prevent water from entering the wall and causing water damage and mold growth.
Step 11 Turn on the Water and Test
Turn on your home's water supply and let water flow through the entire plumbing system. The flow of water will first force air out of the pipes, so wait a few minutes before closing the laundry or basement bathroom sink before going to the tub.
Check the tub faucet and handle for leaks, then turn off the faucet and check again with the faucet under pressure. If all goes well, you should have a new tub faucet that is leak-free.
FAQs About Tub Faucets
Q1: What is the most important first step before replacing a tub faucet?
A: The absolute most critical first step is to turn off the water supply. Locate and turn off the two shut-off valves for the hot and cold water lines. If your home doesn't have individual shut-off valves for the tub, you will need to turn off the main water supply to the entire house to prevent flooding.
Q2: How do I know what type of tub faucet I have?
A: The most common types are compression (has separate hot and cold handles with washers), cartridge (a single handle that controls both temperature and flow via a removable cartridge), and ball-type. Taking a photo of your existing faucet and bringing it to a hardware store is often the easiest way to get help identifying the model and finding the correct replacement parts.
Q3: Can I replace a tub faucet myself, or should I hire a plumber?
A: If you are comfortable with basic DIY projects, have the necessary tools, and have successfully turned off the water supply, replacing a compression or cartridge-style faucet is a manageable task. However, if you encounter corroded pipes, difficult-to-remove parts, or need to modify the plumbing, it is best to hire a professional plumber to avoid causing costly water damage.
Q4: What are the essential tools needed for the job?
A: Basic tools include an adjustable wrench, channel-lock pliers, screwdrivers, and possibly an Allen wrench set. For removing old, corroded parts, a specialized tool called a faucet seat wrench and penetrating lubricant can be invaluable. If you are replacing a wall-mounted faucet, you may also need a tile knife or a small saw to carefully adjust the wall opening.
Q5: Why is my new faucet leaking after installation?
A: A leak is often due to an improper seal. The most common causes are:
Not replacing the washers or O-rings on the new or old components.
An improperly installed or defective new cartridge.
Not properly sealing threaded connections with plumber's tape or pipe joint compound.
Overtightening or undertightening the retaining nuts.
Q6: How long does it typically take to replace a tub faucet?
A: For a straightforward replacement with easy-to-remove parts, the project can take 1-2 hours. However, you should allow for more time if you are a first-timer or if you encounter stubborn, corroded components that are difficult to detach.
Q7: What is the difference between repairing and replacing a faucet?
A: Repairing typically involves fixing a specific issue, like a leaky handle, by replacing a small internal part like a washer, O-ring, or cartridge. A full replacement means removing the entire faucet valve body and installing a new unit, which is necessary for a style change, major leak, or if the faucet is beyond simple repair.
Q8: Should I use plumber's tape (Teflon tape) on the threads?
A: Yes, this is a highly recommended practice. Wrap plumber's tape clockwise around all male threaded connections 2-3 times. This helps create a watertight seal and prevents leaks at the joints. For certain connections, pipe joint compound (pipe dope) can be used as an alternative or in addition to the tape.


